Deep Dive Recap: Mastering Promotional Email Marketing with Lawmatics

Register for upcoming Monthly Deep Dives here.
Marketing can be a tall order for legal professionals to handle in-house, but Lawmatics has everything you need to become a master marketer. Unlike generic CRMs, our platform is specifically designed for legal specific needs, offering customized tools to help promote events, run promotions, and manage any other marketing needs.
Lawmatics offers an impressive range of marketing features, and the best part is they are all highly customizable. With Lawmatics, it's easy to use these tools and implement them across your entire firm, and many of them can even be automated.
Say goodbye to guessing about your marketing efforts. Lawmatics provides detailed statistics on email campaign performance, including open rates, click rates, and bounce rates. With this information, you can analyze engagement rates and make informed decisions about future marketing strategies.
Read on to learn all the tools available to help you become a masterful email marketer.
Email design
To effectively send out a marketing email and track its performance, you need to begin by determining what you're promoting and crafting compelling email content to match. The possibilities for email topics are endless, but some examples include firm announcements, promotional offers, holiday messages, newsletters, and personalized birthday or anniversary greetings.
Let’s use a birthday email as our example. For this email (as well as the vast majority of your other marketing-driven emails) you will want to create an HTML template as opposed to a plain text email. HTML emails offer a wide variety of design and content options for creating a beautiful and eye-catching email.
- To get started, navigate to the Emails page under the Assets tab and select Create Template. Here you will see options for a base email to choose from, or create from scratch. Selecting a base is a great way to get started with basic design elements of your email.
- Once in the email builder, you will have the option to add content to the email template of and adjust the structure by dragging and dropping Rows. Below you will see the different Row options on the right side of the screen, and a newly added row at the very bottom.
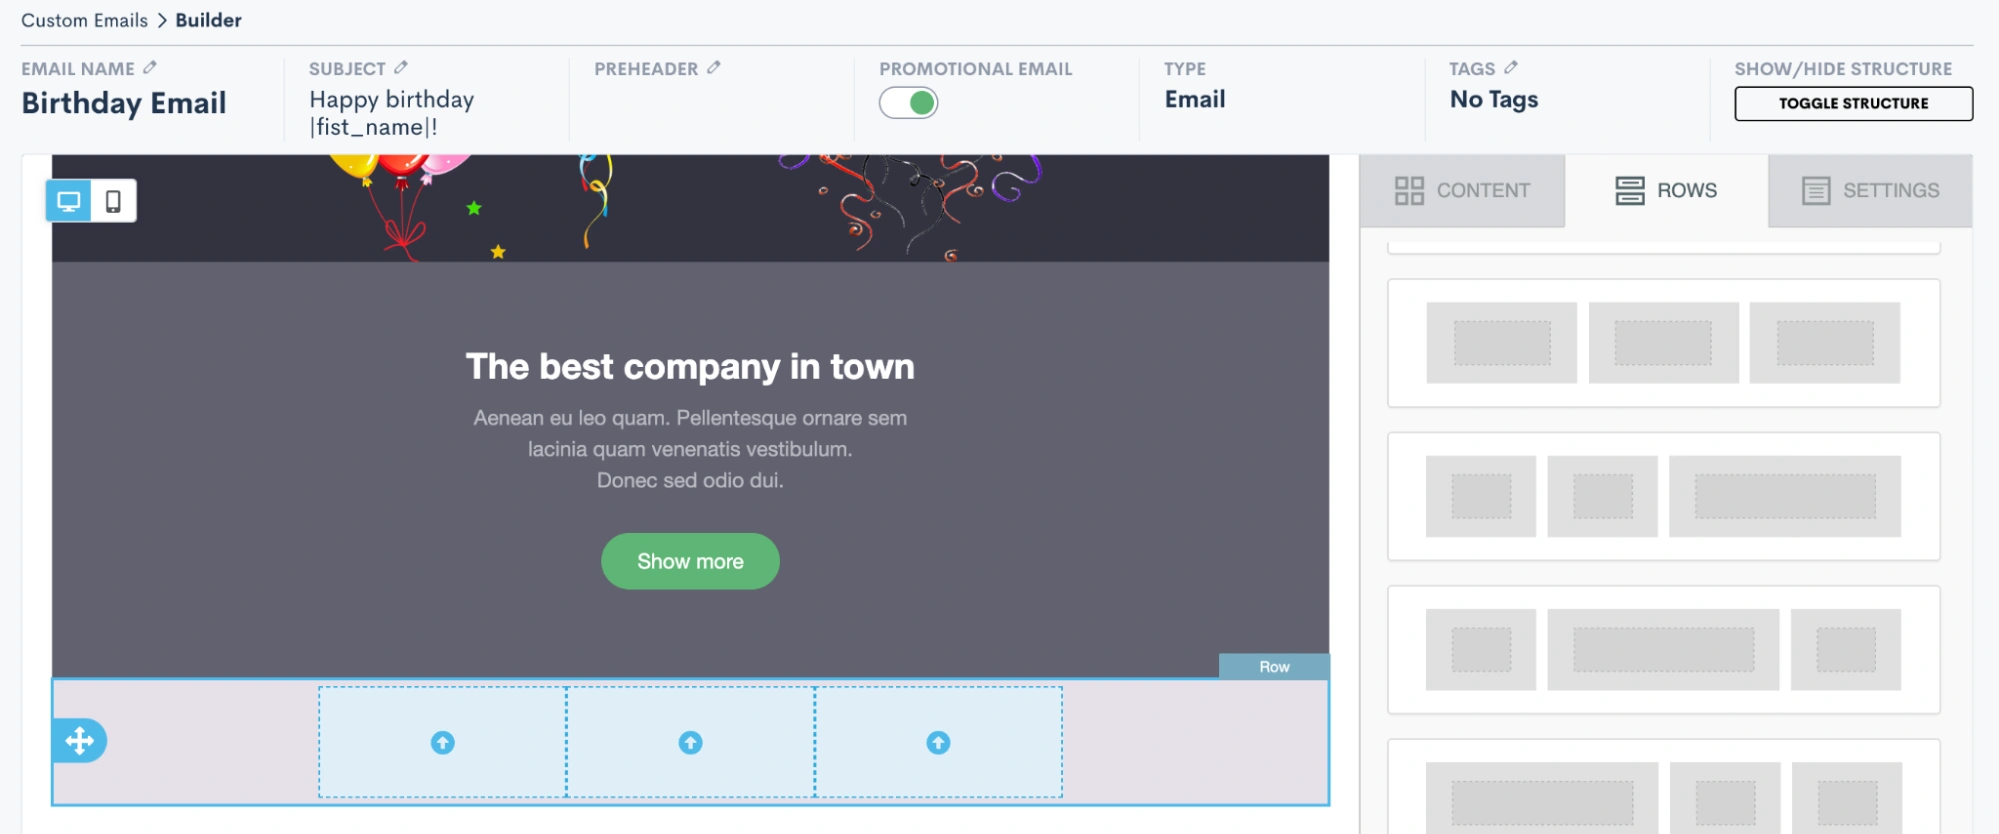
- Once you have added a row – such as the 3-column row added above – your next step is to add content into the row. Content can be anything from images, to videos, to text, to buttons, etc. Click on the Content tab over on the right side of the screen, and then drag and drop any content into your new row.
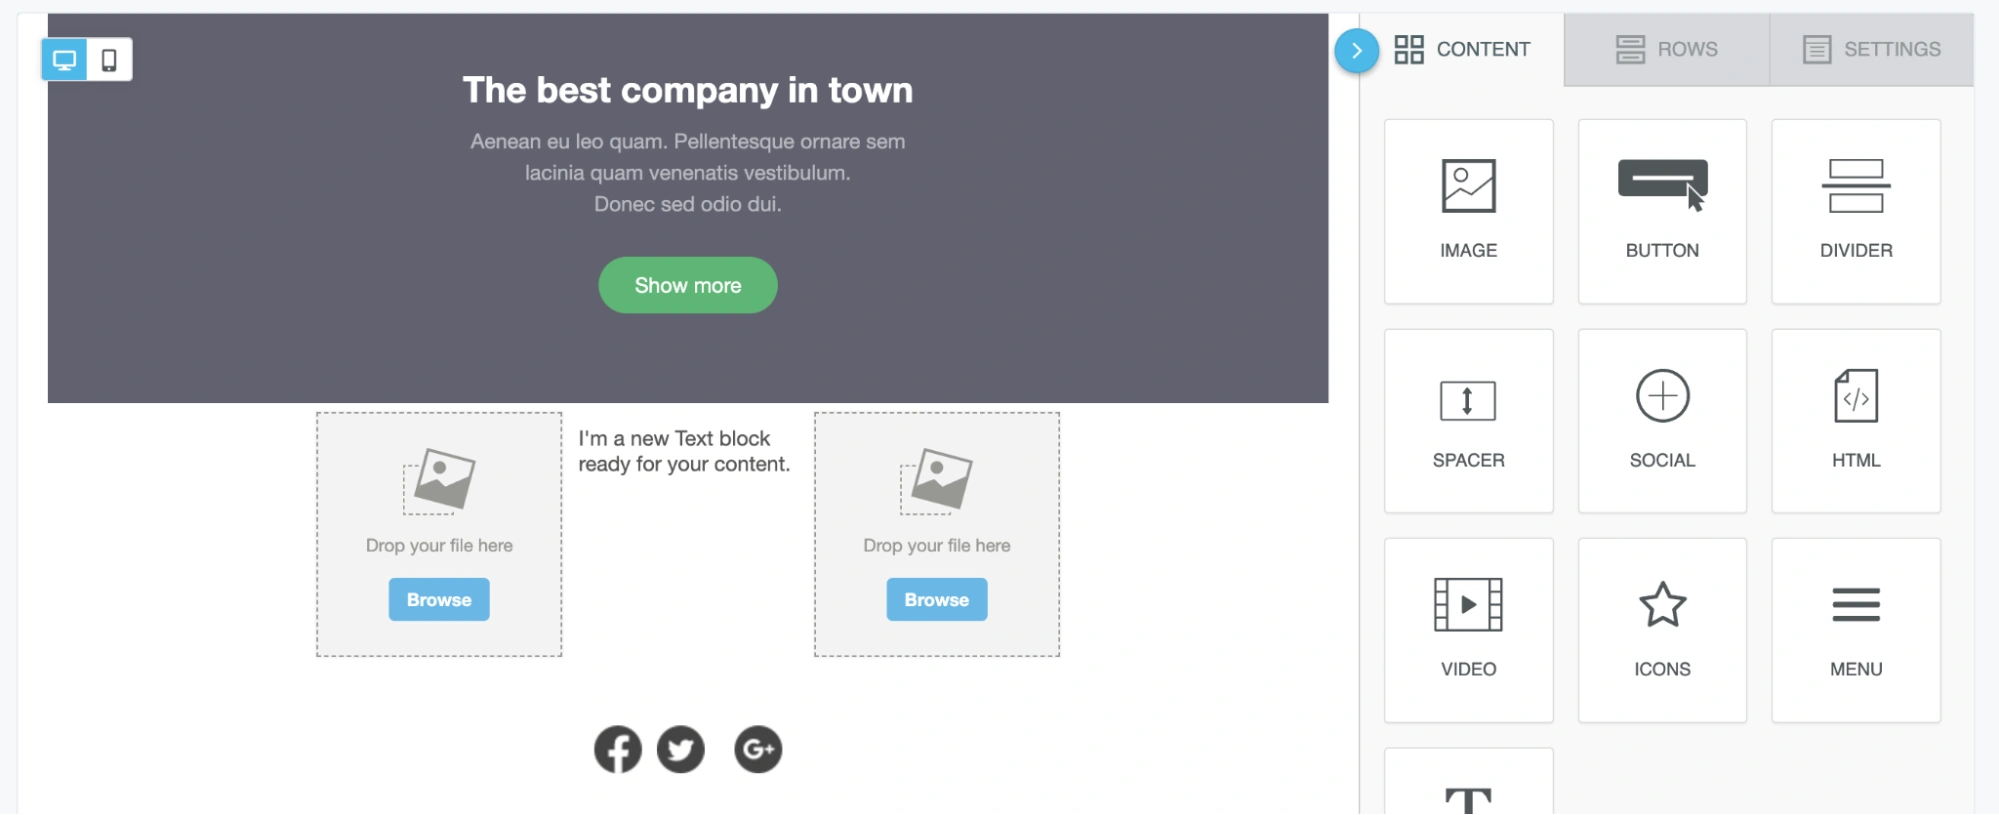
- In the image above, you can see that we have added an image, a text block, and then a second image into our 3-column row. Use the Browse button on the image content to upload your own image file or select from a variety of stock images. Similarly, click into the text box to type or paste in your text content as well as to select formatting options and merge fields as desired.

- Above you see the “first name” field has been added into a text block using the merge tags button, highlighted in red. You will see a full list of all of your fields, including custom fields, when clicking the merge tags button.
- Once you have your rows and content added into the email, you can also make other selections for email settings such as background color, layout width, etc. Click on the Settings tab on the right side of the screen to view these options.
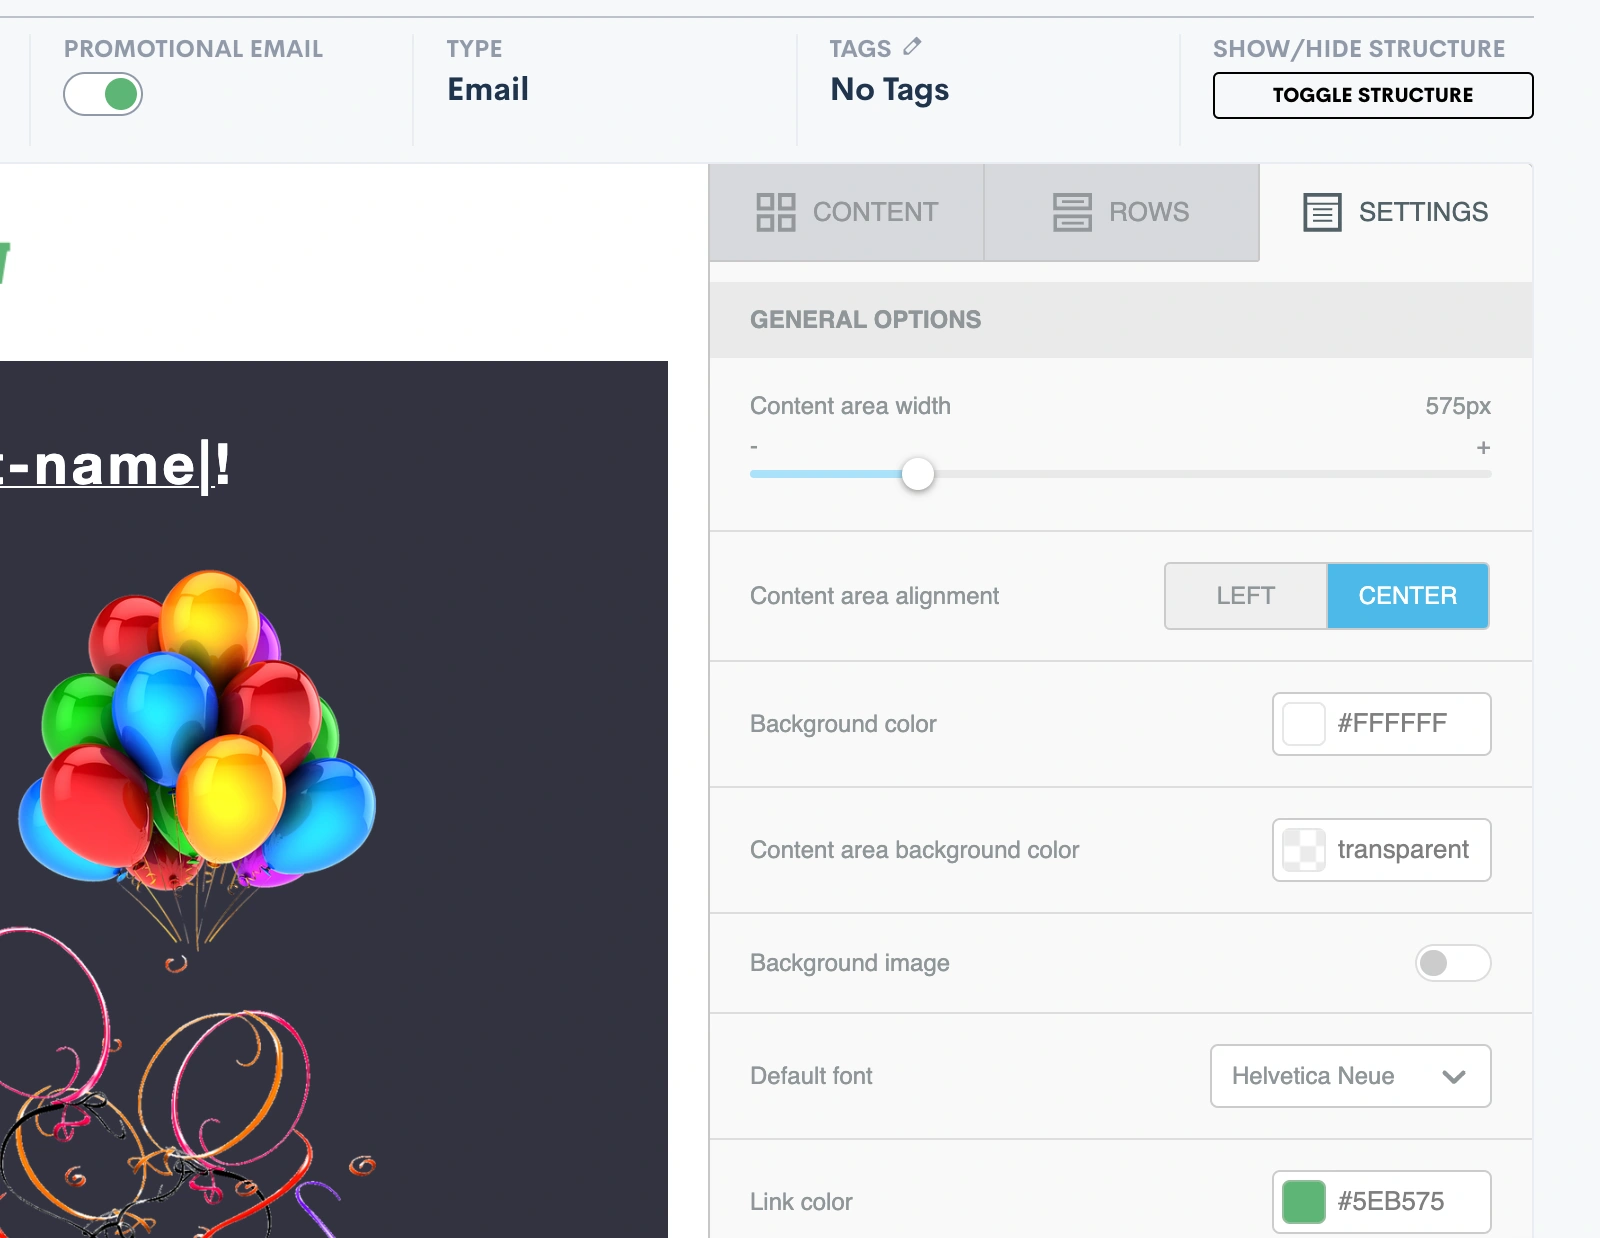
- For any of your marketing/promotional emails it is very important that you select the Promotional Email toggle button shown at the top of the image above. Activating this will add an unsubscribe link at the bottom of your email. This is legally required so that your target audience has the opportunity to opt out of future promotional emails. Anyone who clicks the unsubscribe link will no longer receive bulk (promotional) emails from you, but they still can get your one-off emails sent via Lawmatics.
- Once you are ready to save your email, notice that you have two different options: Save Email or Save As. Click Save As to enter your email title, subject line, and enter a preheader if desired.
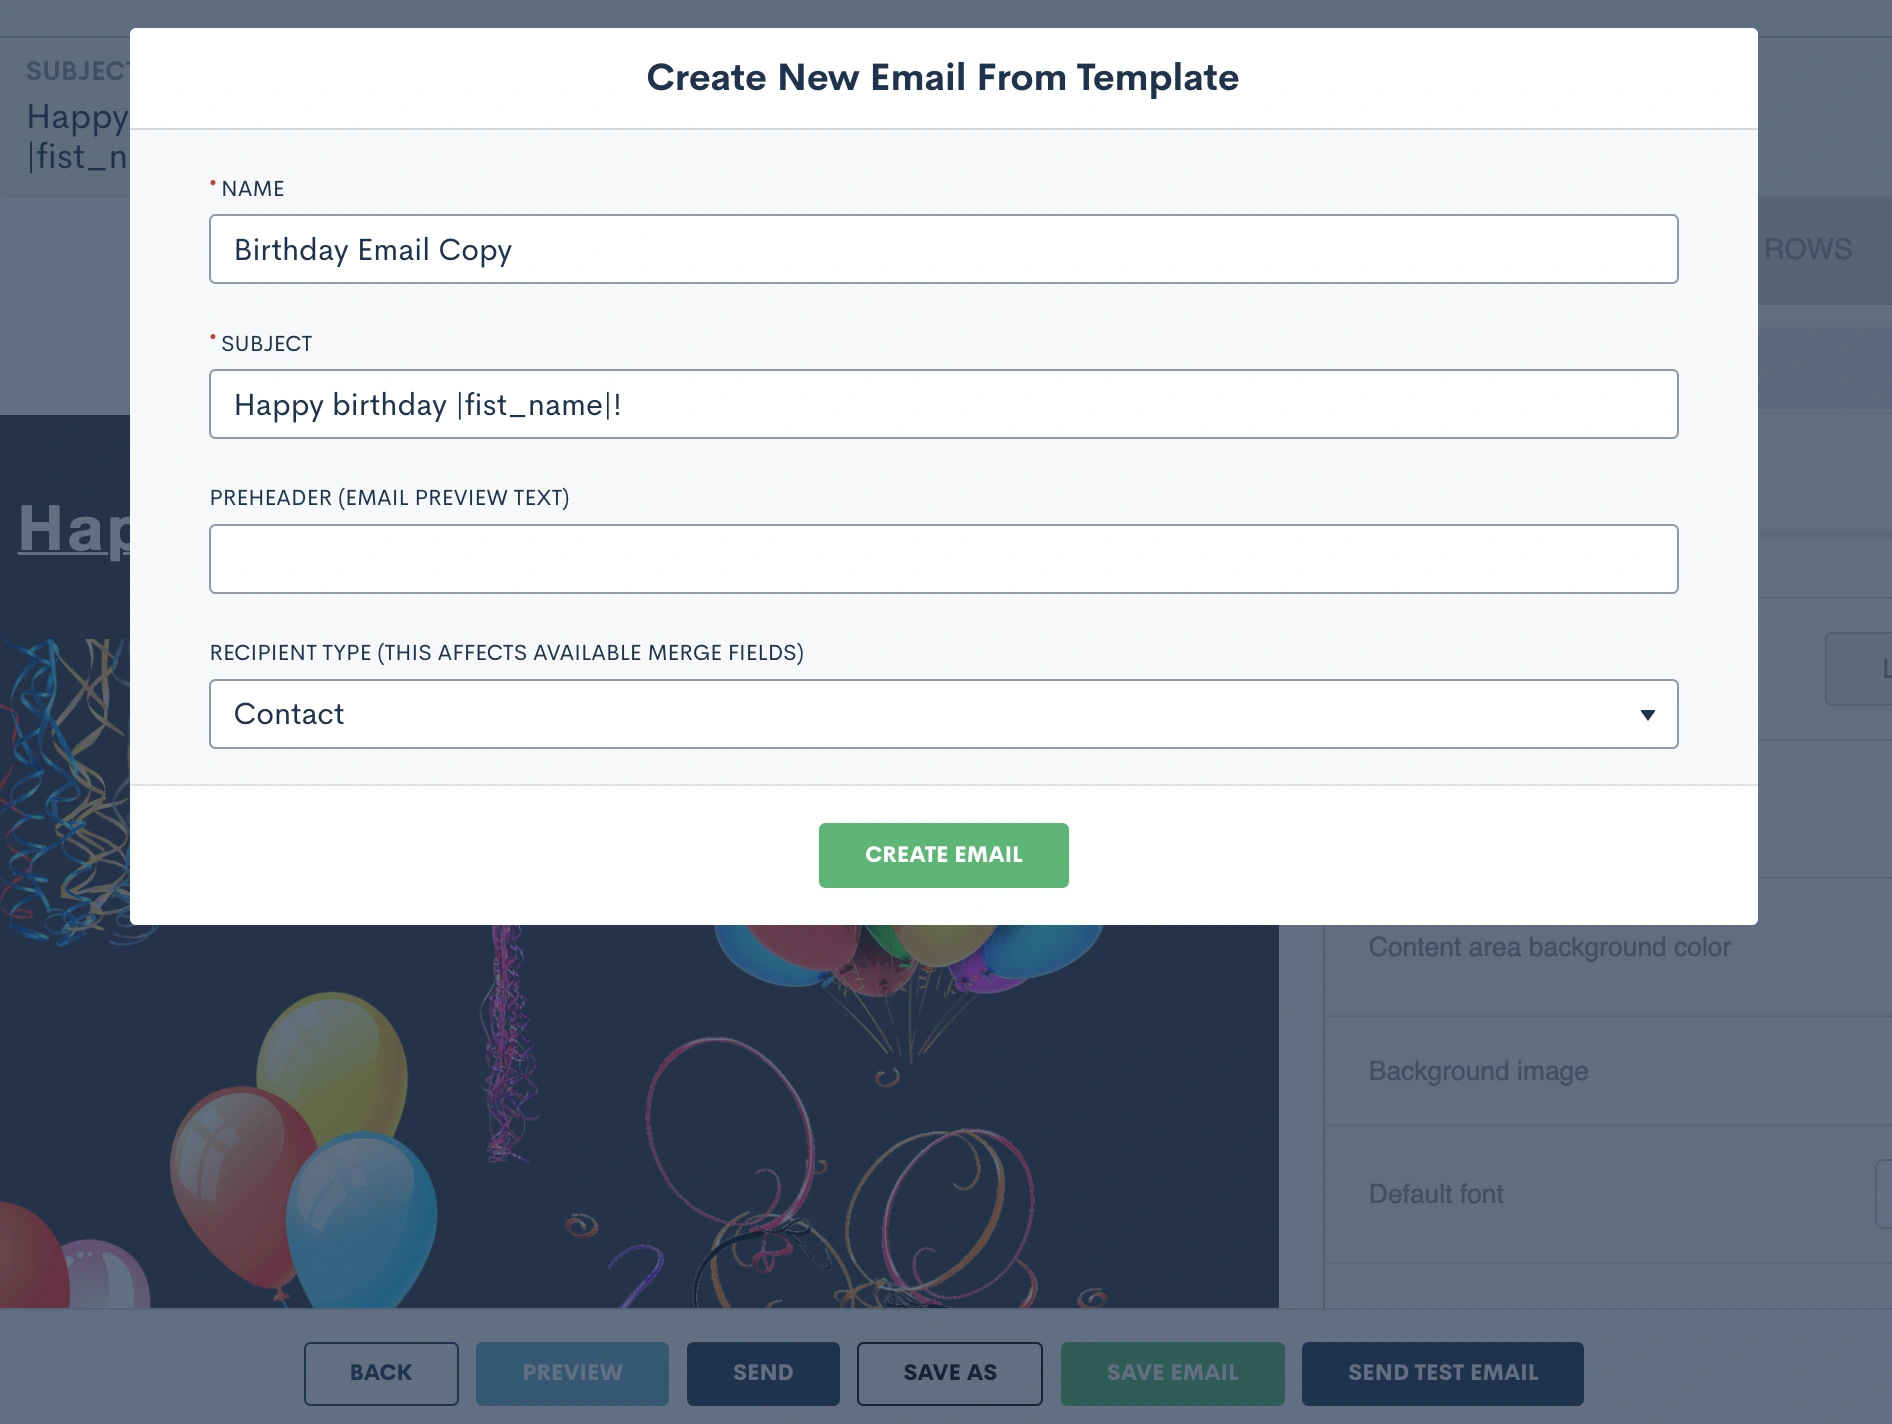
- Be sure to select the recipient type as Contact for any emails that are going to your general marketing audience. Once you have saved the email, you can always come back to make edits, updates, or “save as” to create a copy.
Create filtered target audiences
Now that you have your email content ready, your next step is to select the audience you’ll be sending the email to.
- Begin this process by selecting the Audiences option under the Marketing tab.
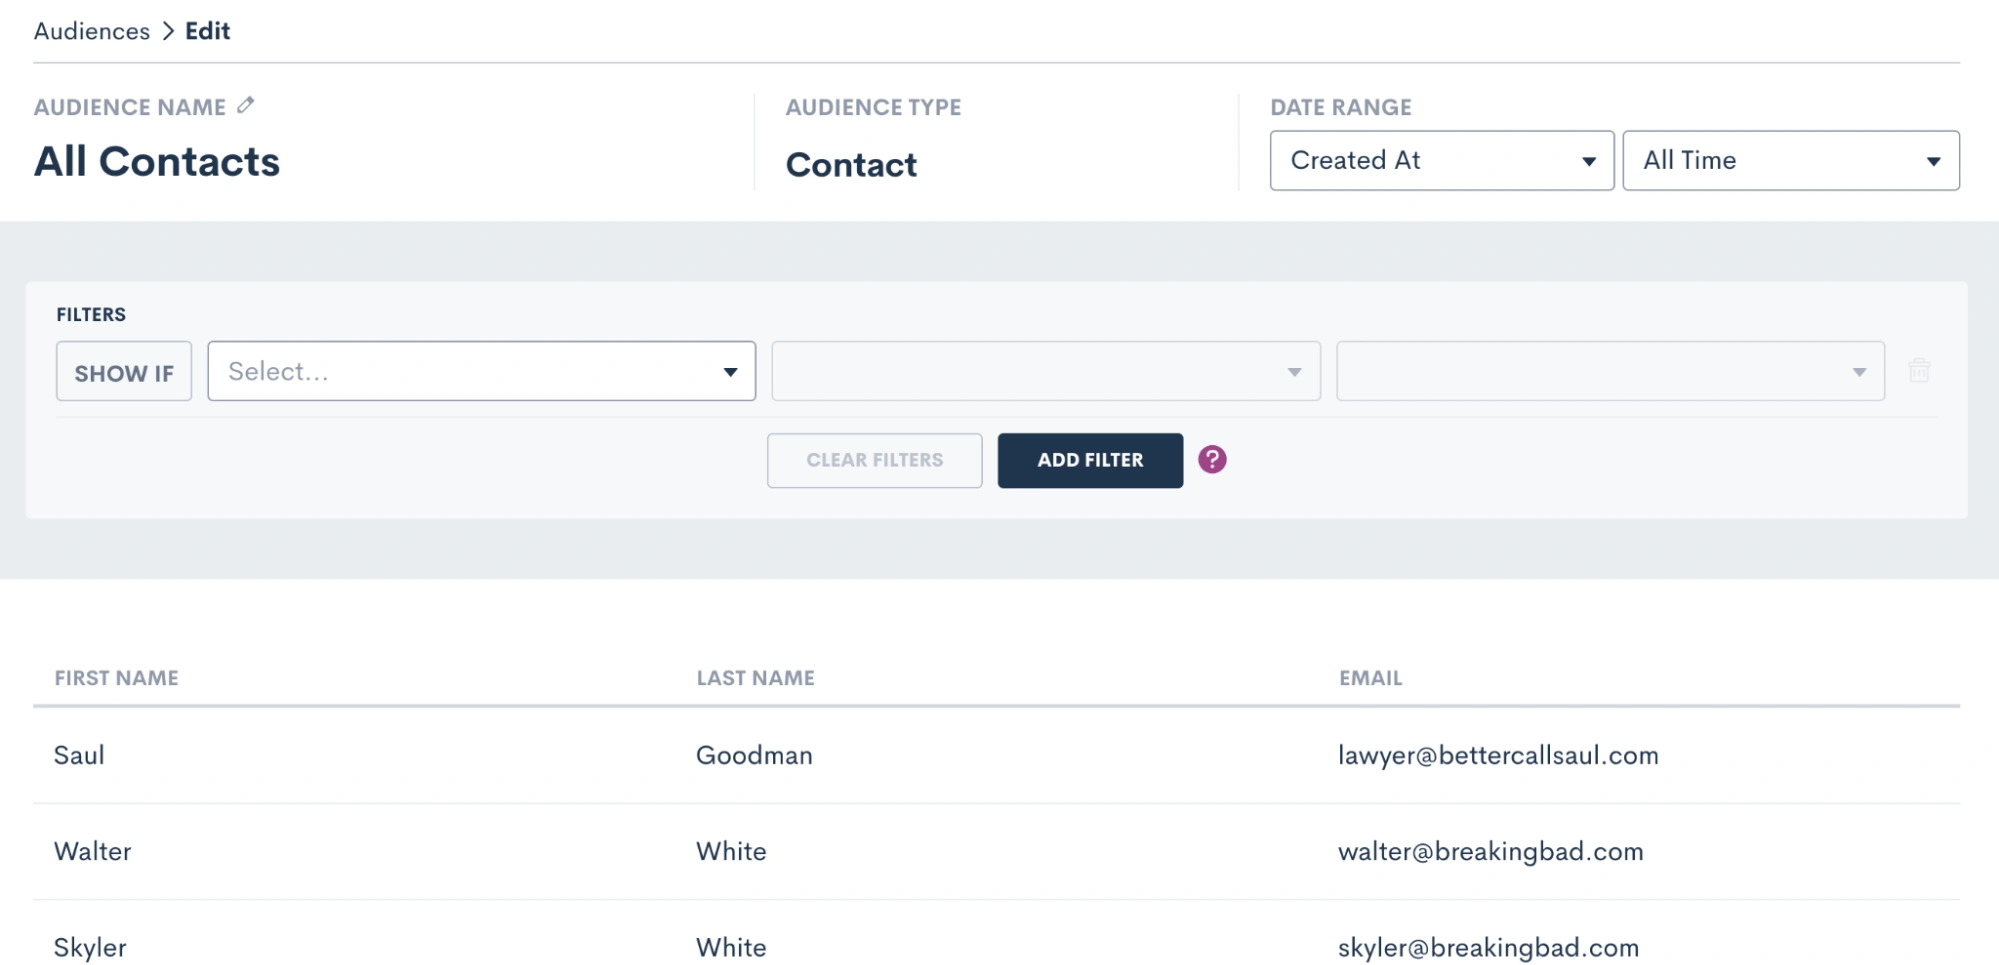
- Click Create New Audience and give your audience a name such as “All Contacts” or “Estate Planning Clients”, depending on the group you are targeting. For any broad marketing audiences used for sending a birthday email, holiday emails, firm newsletters, etc you will generally want to create an audience of Contacts as opposed to Matters.
- Once your audience is created, it’s time to select filters. For a broad audience of all contacts you will not add any filters, you simply want the audience to include your full list of contacts.
- For other instances, you may wish to create a more targeted audience. For example, let’s say you have an email targeted specifically for closed criminal defense cases. In this instance, you would add a filter for practice area as well as the case closed status, as shown below.
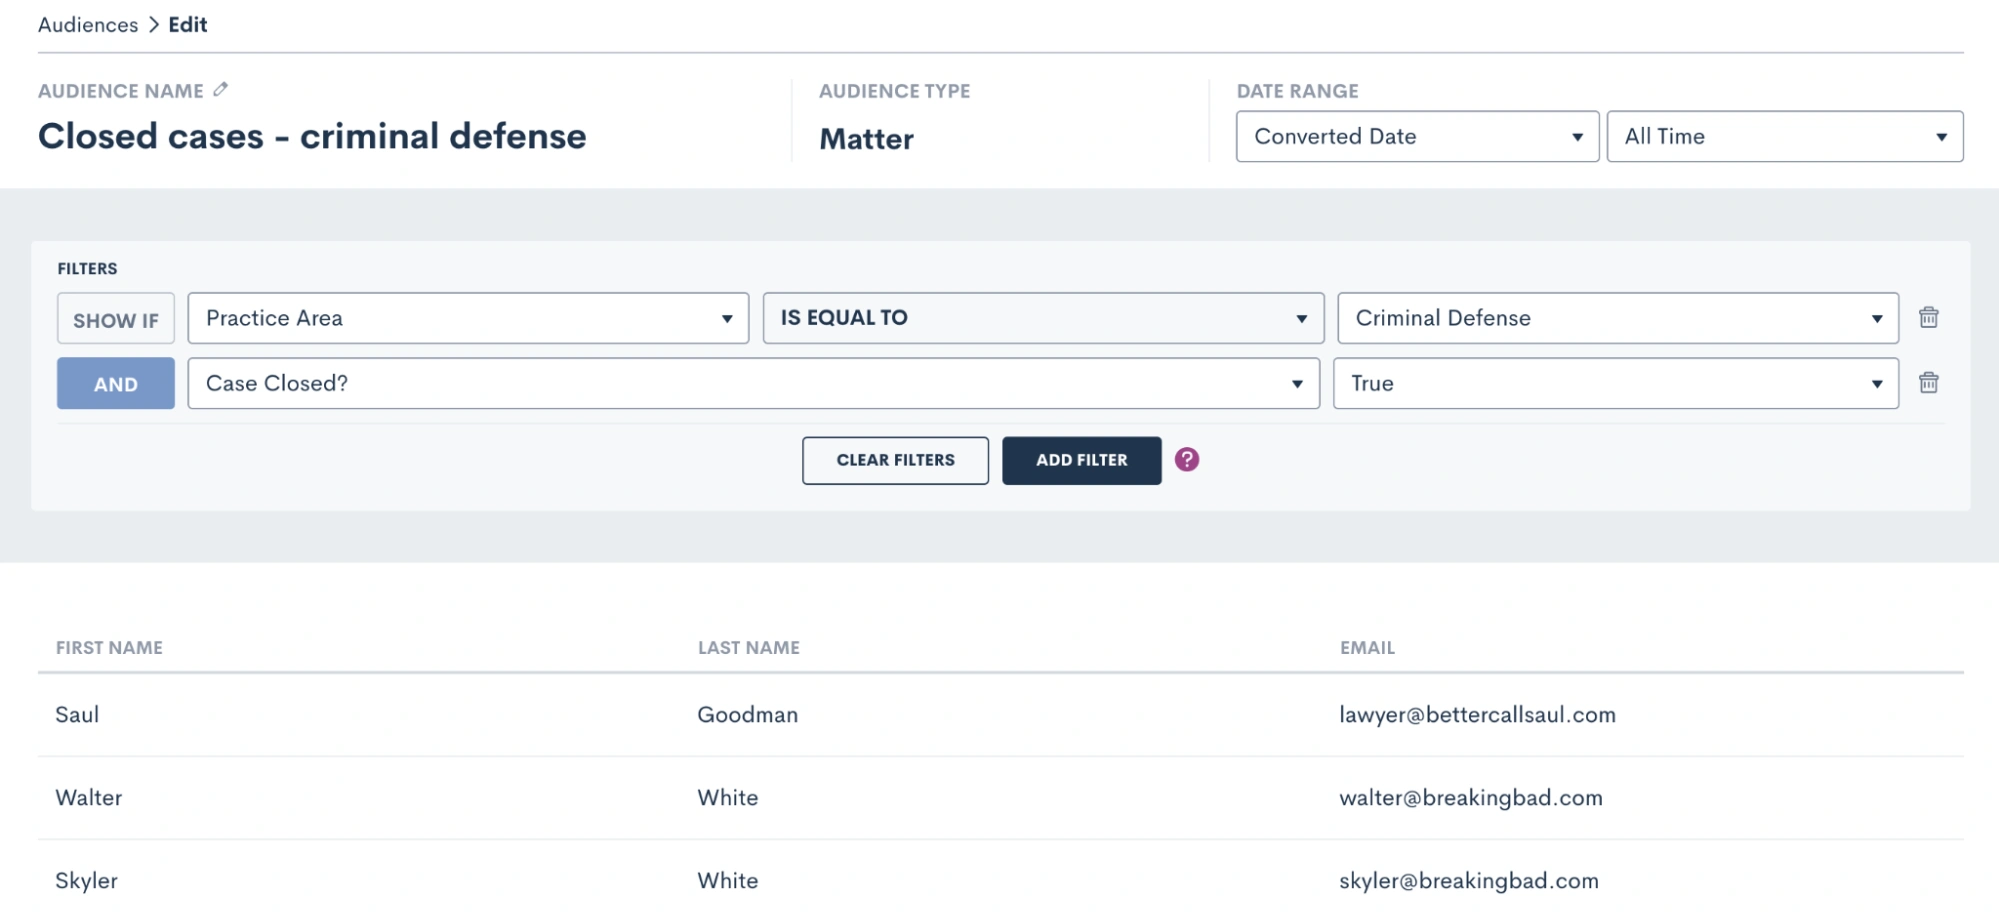
The system will filter out any contacts that don’t meet your specifications, so that you are targeting only those who do meet them in this particular audience.
Send emails with campaigns
You now have your email content created as well as the audience you wish to send the email to, it’s time to send the email! Select Campaigns under the Marketing tab and then click Add New Campaign. There are three different kinds of email campaigns you can create, you’ll see those options at the bottom of the pop up. Let’s run through each of them.
Run once
Run Once will likely be your most commonly used campaign type since you will use it for holiday emails, newsletters, and general one-off announcements or promotions. Think of this campaign as your option for “email blasts”.
- For any campaign type you select, you will first need to enter a campaign name, select your email template, audience list, and select which of your firm users (or the firm email) the email should send from.
- Once you select Run Once as the type, you will be prompted to select when to run the campaign. When Manual Activation is selected, it will be up to you to activate the campaign whenever you would like to actually send the email.
- If you wish to add more automation to this campaign, you can opt to run the campaign on a specific date.
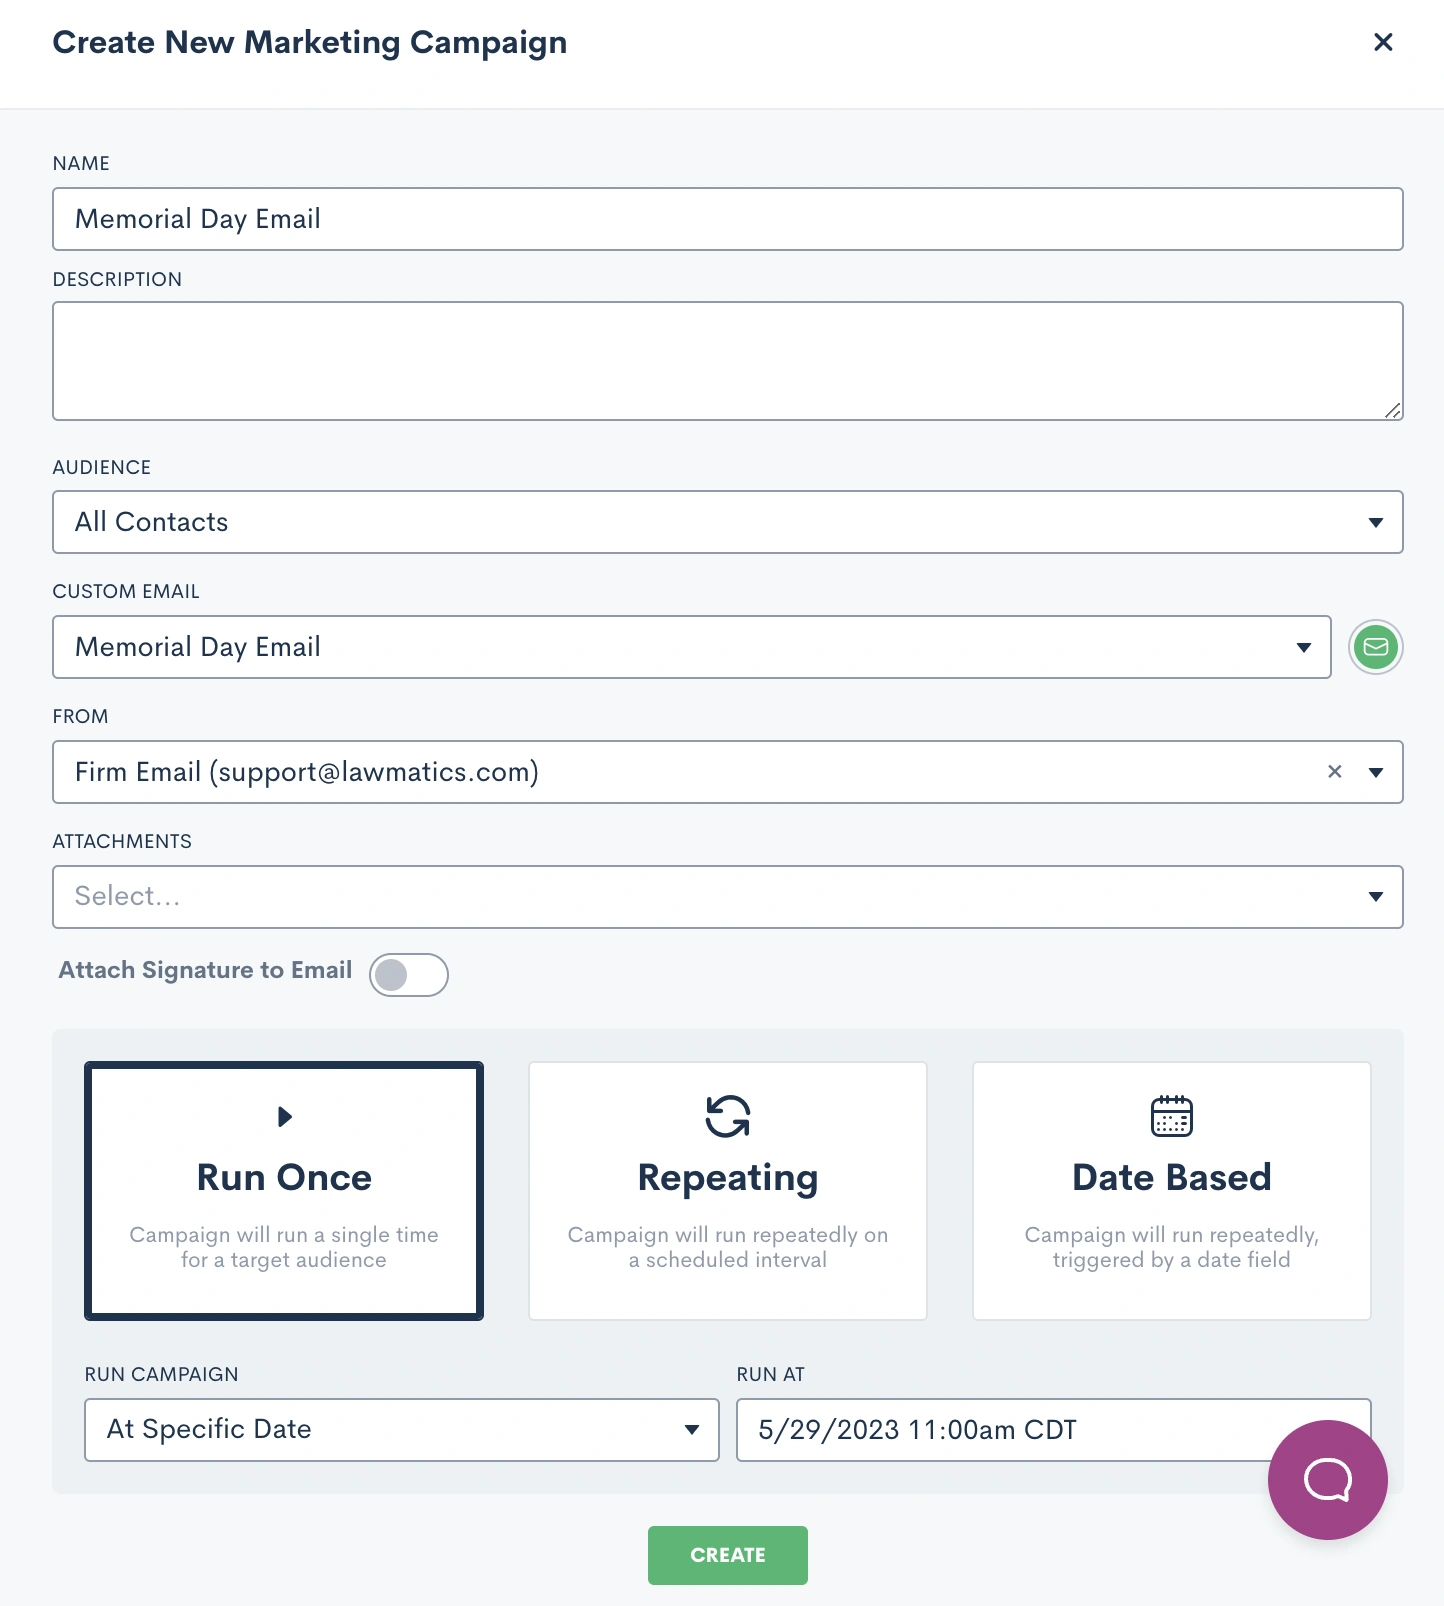
- When this option is selected, you will not need to manually activate the campaign to send the email. Rather, the email will be sent automatically at the date and time that you have selected on the calendar. All you need to do is hit the Create button, and then the email sends automatically on the correct day.
Repeating
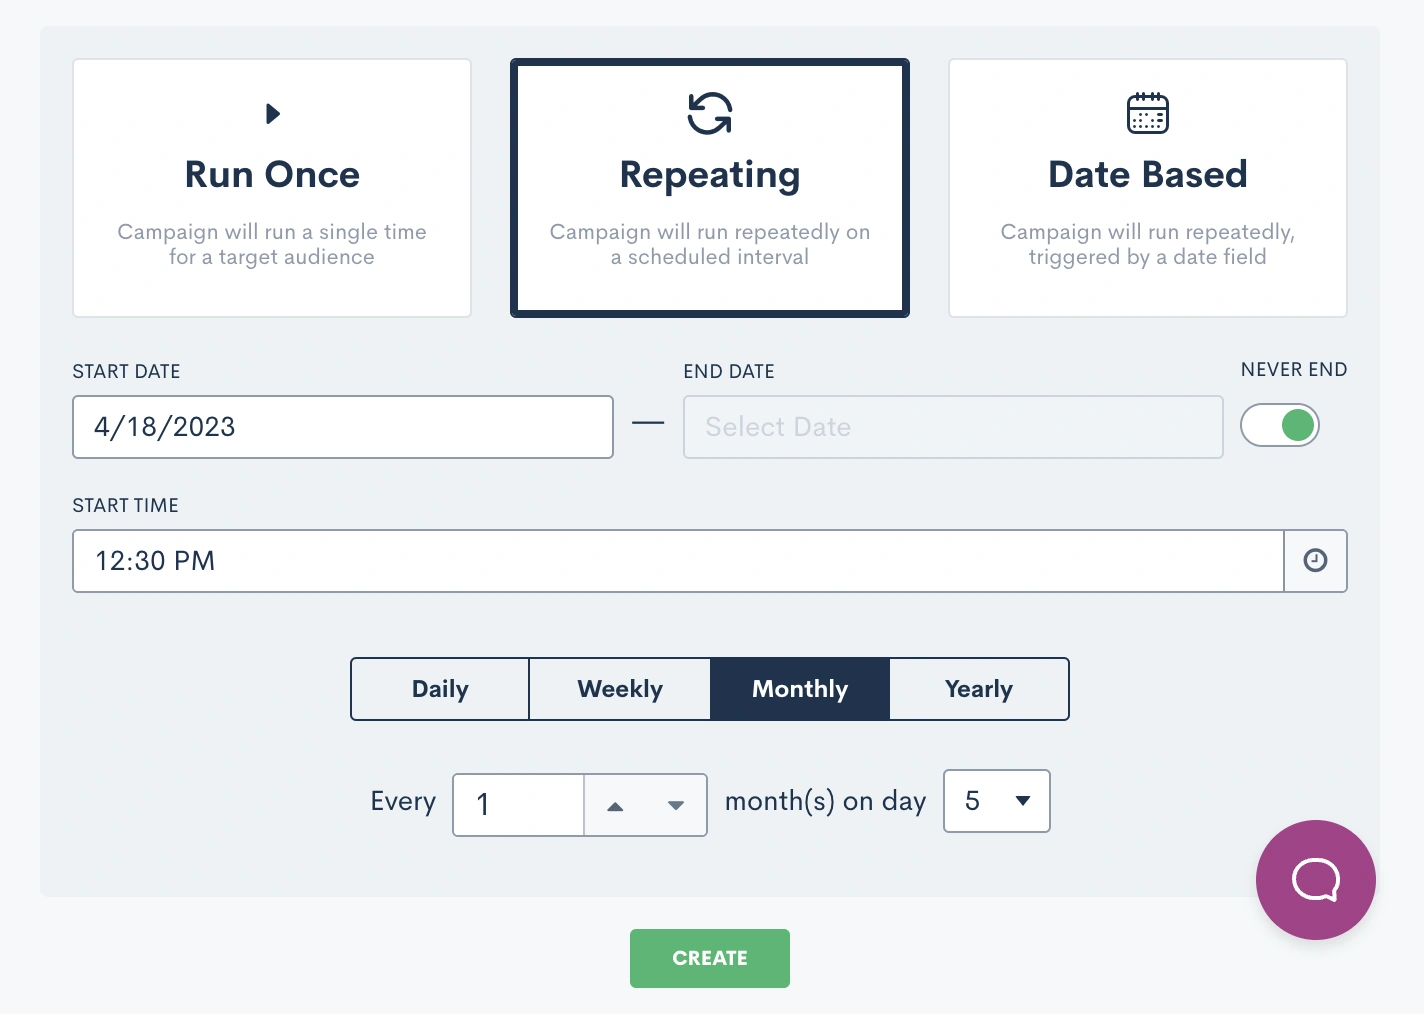
The key thing to remember when creating a Repeating email campaign is that the same email template will be sent on a repeating interval. With that being said, this does not work for newsletters or holidays, since those emails will be different each time.
Repeating campaigns allow you to create a custom schedule for sending a particular email on a recurring basis. When you select Repeating, you will be able to set the custom schedule for the campaign.
Date based
Finally, Date Based campaigns are your method for sending out birthday or anniversary emails on a particular date that is unique to each contact.
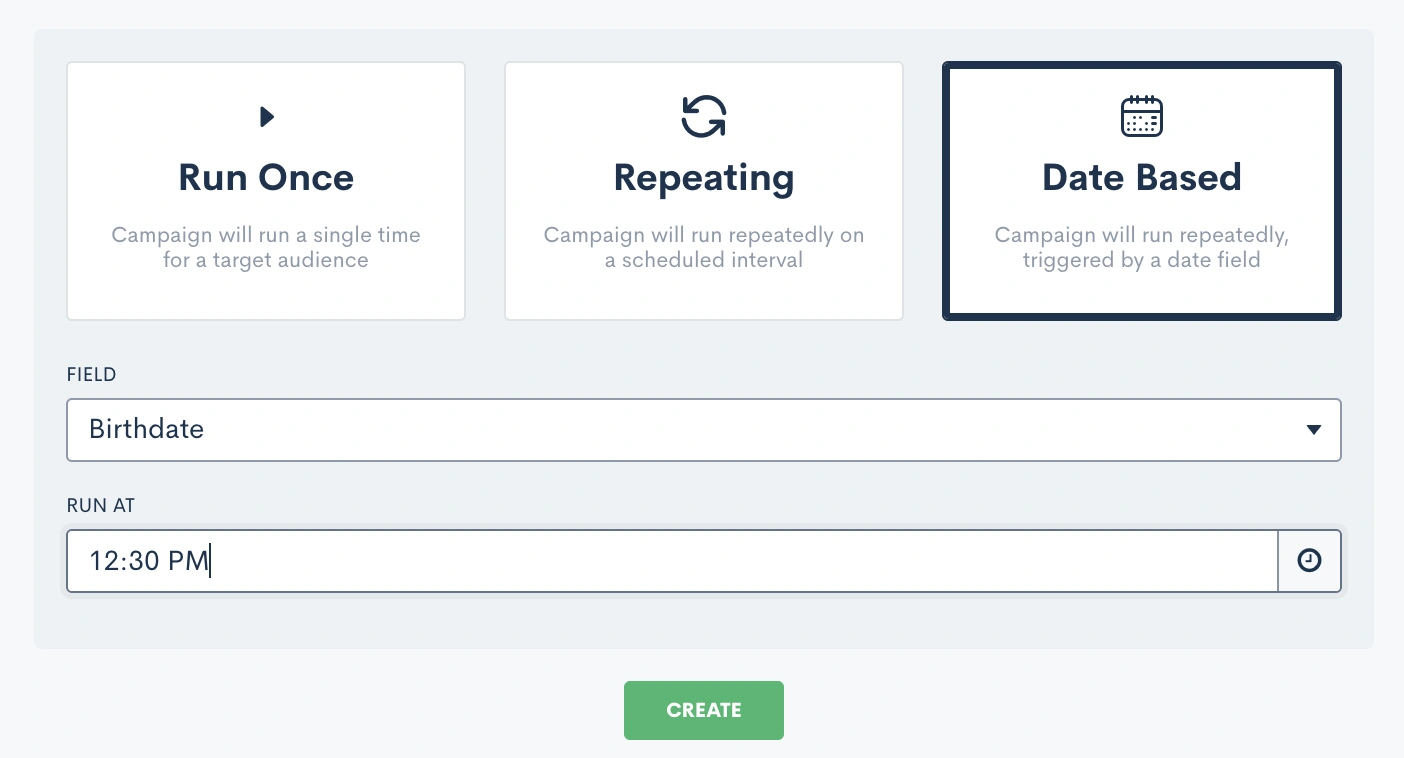
After you select Date Based, you will need to select which field should be used for the date for this campaign, I’ve selected Birthdate above. You will be able to select from any date type fields in your CRM, including custom fields. Note that if you have selected an audience of contacts, as opposed to matters, you will not be able to select a matter field as the date field for this campaign.
Once the campaign is active, it will start sending the email on the appropriate date for each individual at the specific time you have selected.
Track campaign performance
One of the main reasons to use an email campaign to send out your firm's marketing emails is to track the performance of each campaign. This includes bounces, opens, and clicks.
To view the stats for an email campaign simply click on the name of the campaign to open up the campaign details. You will then see a page similar to the one shown below.
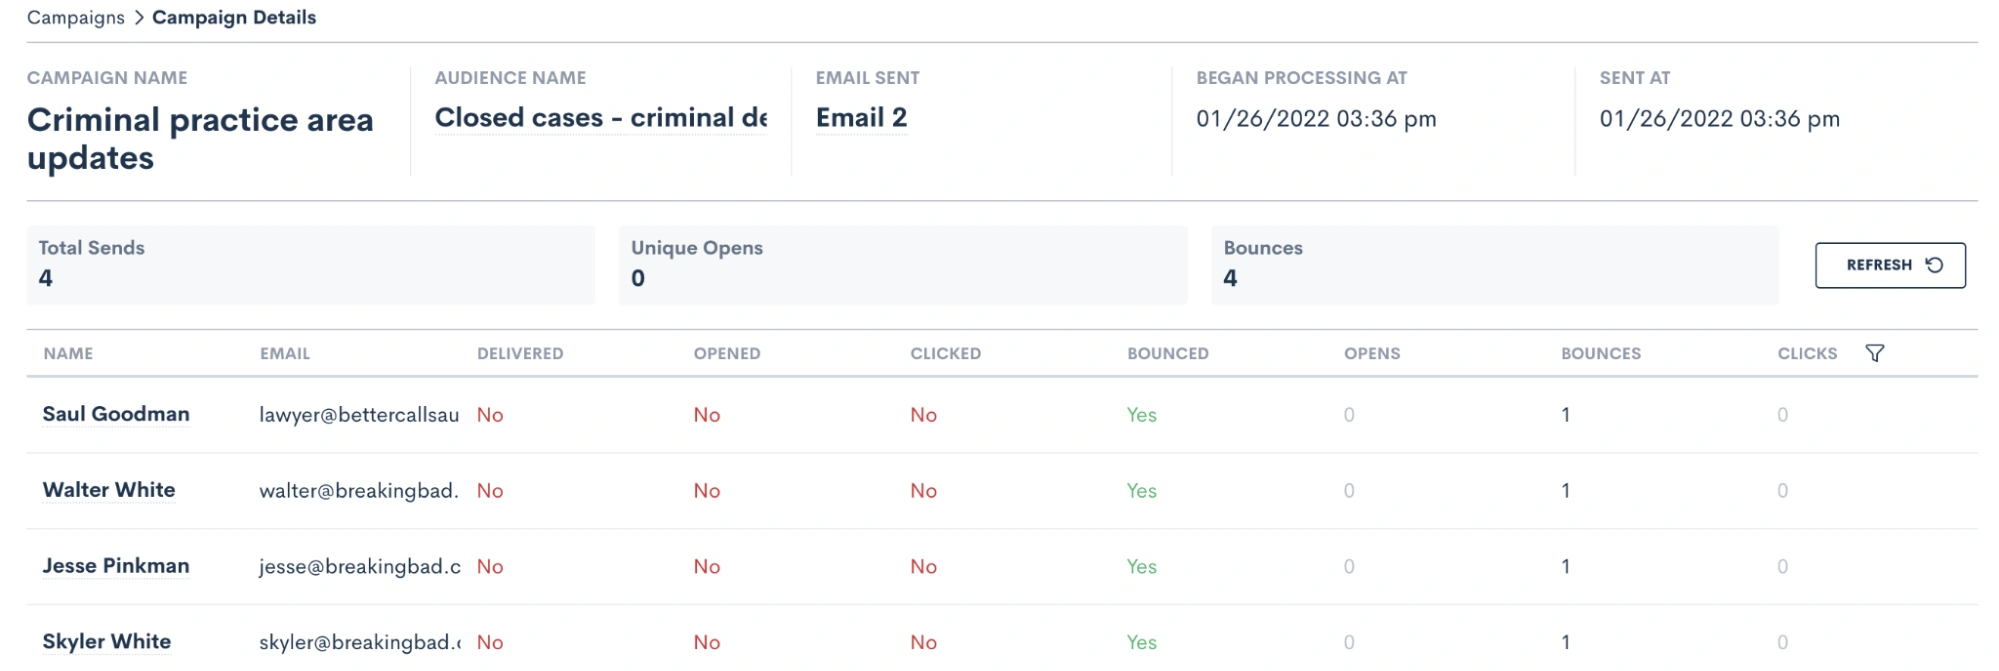
For run once email campaigns you will be able to view your stats as soon as the campaign has been activated and the email has been sent. This could be from manual activation or from a scheduled send. If you check the stats immediately after the email is sent, you will get a good indication of the delivery/bounce rate, but keep in mind that the additional stats like opens and clicks will be logged over time as the recipients open or click on any links in the email.
With repeating campaigns, keep in mind that your stats will not necessarily appear as soon as you activate the campaign, since these campaigns will be running on a specific interval over a period of time. Also remember that with this type of campaign, you may see the same contacts listed several times in the stats, since they are receiving the email repeatedly.
With date based campaigns, you will generally see the stats slowly tick up after you have activated the campaign. By definition, your recipients in this type of campaign will only receive the email once a year on the appropriate date for them, so as time passes more recipients will have received their email.
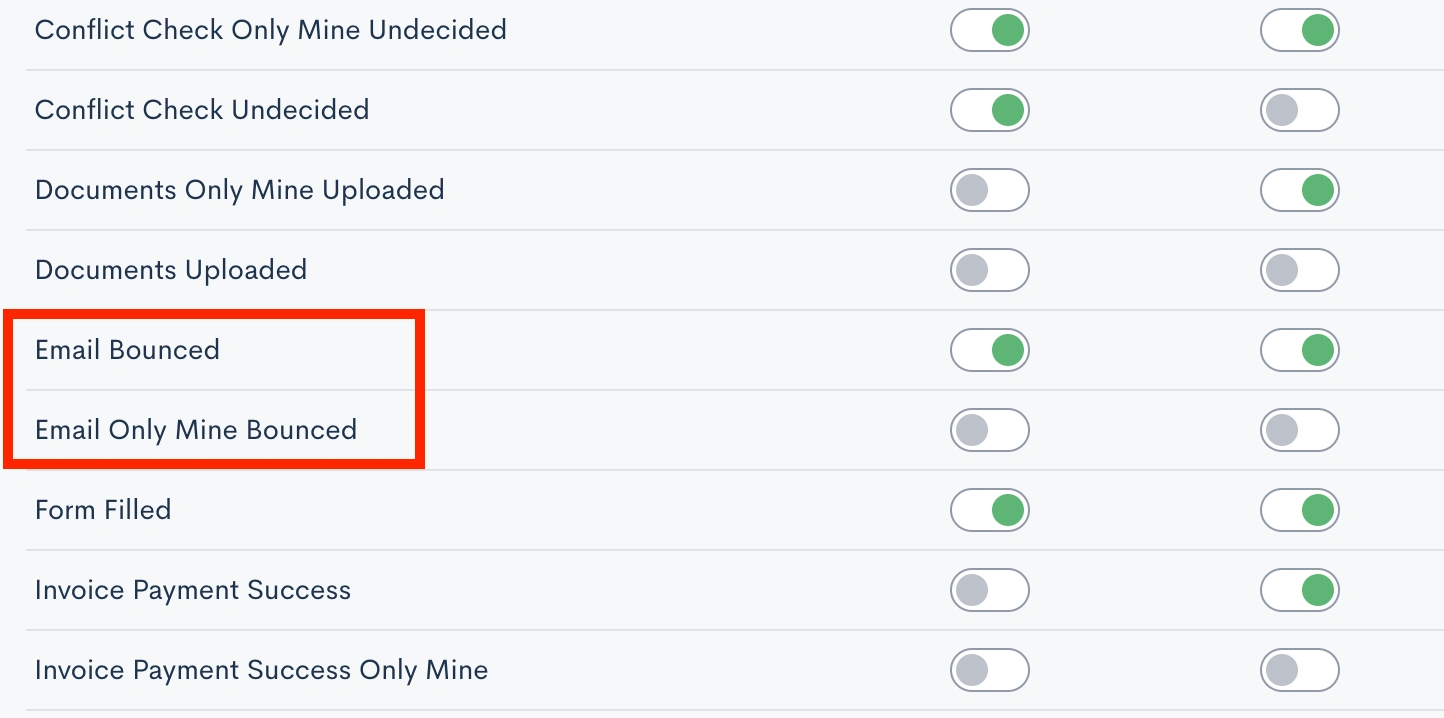
When it comes to emails bouncing, you may choose to be notified of email bounces in the platform so that you can be sure to correct an invalid email when possible. To enable this notification go to the Notifications page in settings, then choose either the Email Bounced option to be notified of all bounces, or the only mine option to only be notified of bounces on an email sent from you.
Now that you know how to access your campaign stats, it’s important to take the next step of analyzing and interpreting these metrics to make informed decisions for future campaigns. Pay attention to the time of day the email was sent, the specific filters on your audience list, and the type of content in the email to see what generates the highest engagement rate.
As you discover what works and what doesn’t, feel free to incorporate those findings into your future email campaigns for improved engagement and overall results!
Conclusion
Promotional email marketing is a great way to keep your firm top of mind among your target audience. With Lawmatics, you’ll find that you can implement professional-seeming email campaigns with no additional financial investment and very extra little time investment.
Lawmatics has also taken things a step further and provided you with the ability to monitor and track all of your email campaigns. Without the ability to track your marketing efforts, you’ll never know which ones to invest further in or which ones to ease off of. This feature alone is one of the many things that distinguishes Lawmatics from many of your other options.
Say goodbye to piecemealing multiple marketing softwares and setting up complicated zaps and integrations. Lawmatics has everything you need to master promotional marketing all in one platform.